Building a Personal/Team "Permanent" Image Host with Cloudflare R2 + ShareX
Building a Personal/Team "Permanent" Image Host with Cloudflare R2 + ShareX
This guide walks you from zero to a working image host — high-performance, reliable, near-zero cost, and fully under your control — built on Cloudflare R2's free tier and ShareX's workflow automation.
End result: press a hotkey to take a screenshot, have the image automatically uploaded to your own storage (or upload existing local images manually), and get a Markdown-formatted link copied straight to your clipboard for seamless writing.
Contents
- Part 1: Configure Cloudflare R2 (cloud storage)
- Part 2: Configure ShareX (desktop client)
- Part 3: Optimize the ShareX workflow
- F.A.Q. and troubleshooting
Part 1: Configure Cloudflare R2 (cloud storage)
First, enable R2 storage in Cloudflare.
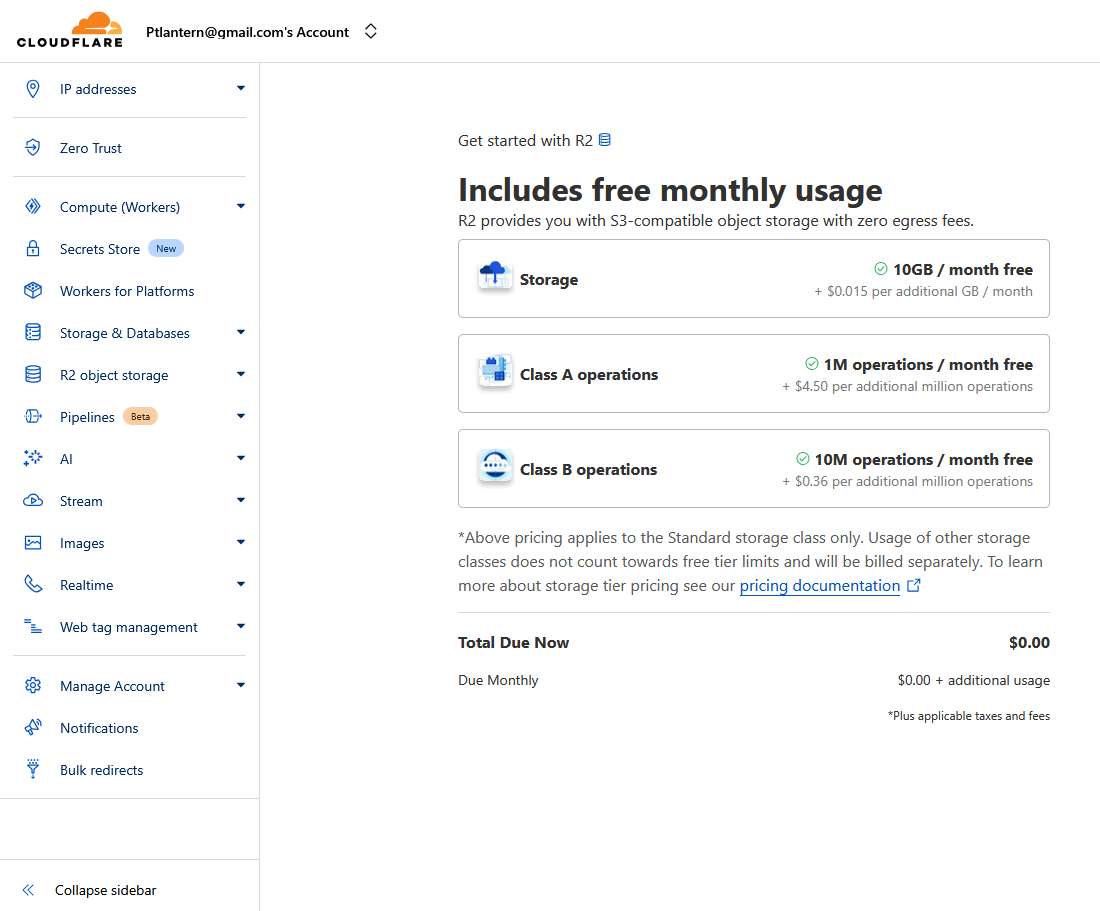
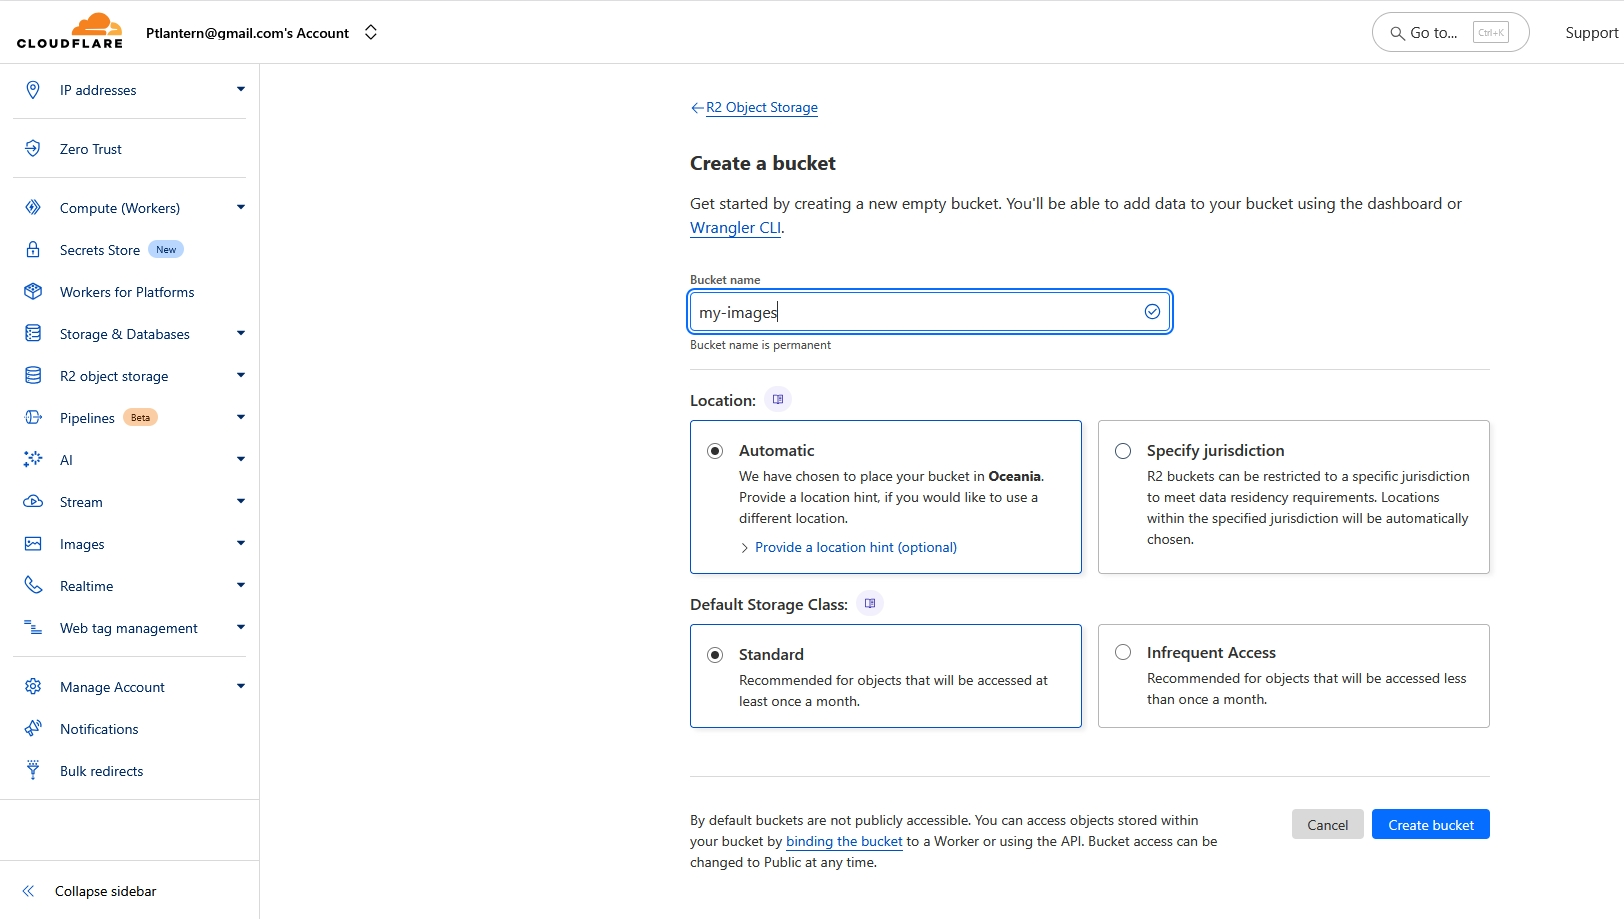
1.1 Create an R2 bucket
A bucket is the container that holds all your images.
- Sign in to the Cloudflare dashboard and open R2 from the left-hand menu.
- Click Create bucket.
- Bucket name: enter a globally unique bucket name (for example,
your-org-images-2025). - Location: leave the default Automatic.
- Click Create bucket.
1.2 Enable public access on the bucket
To let uploaded images be served externally, turn on public access.
- Open the bucket you just created and click the Settings tab at the top.
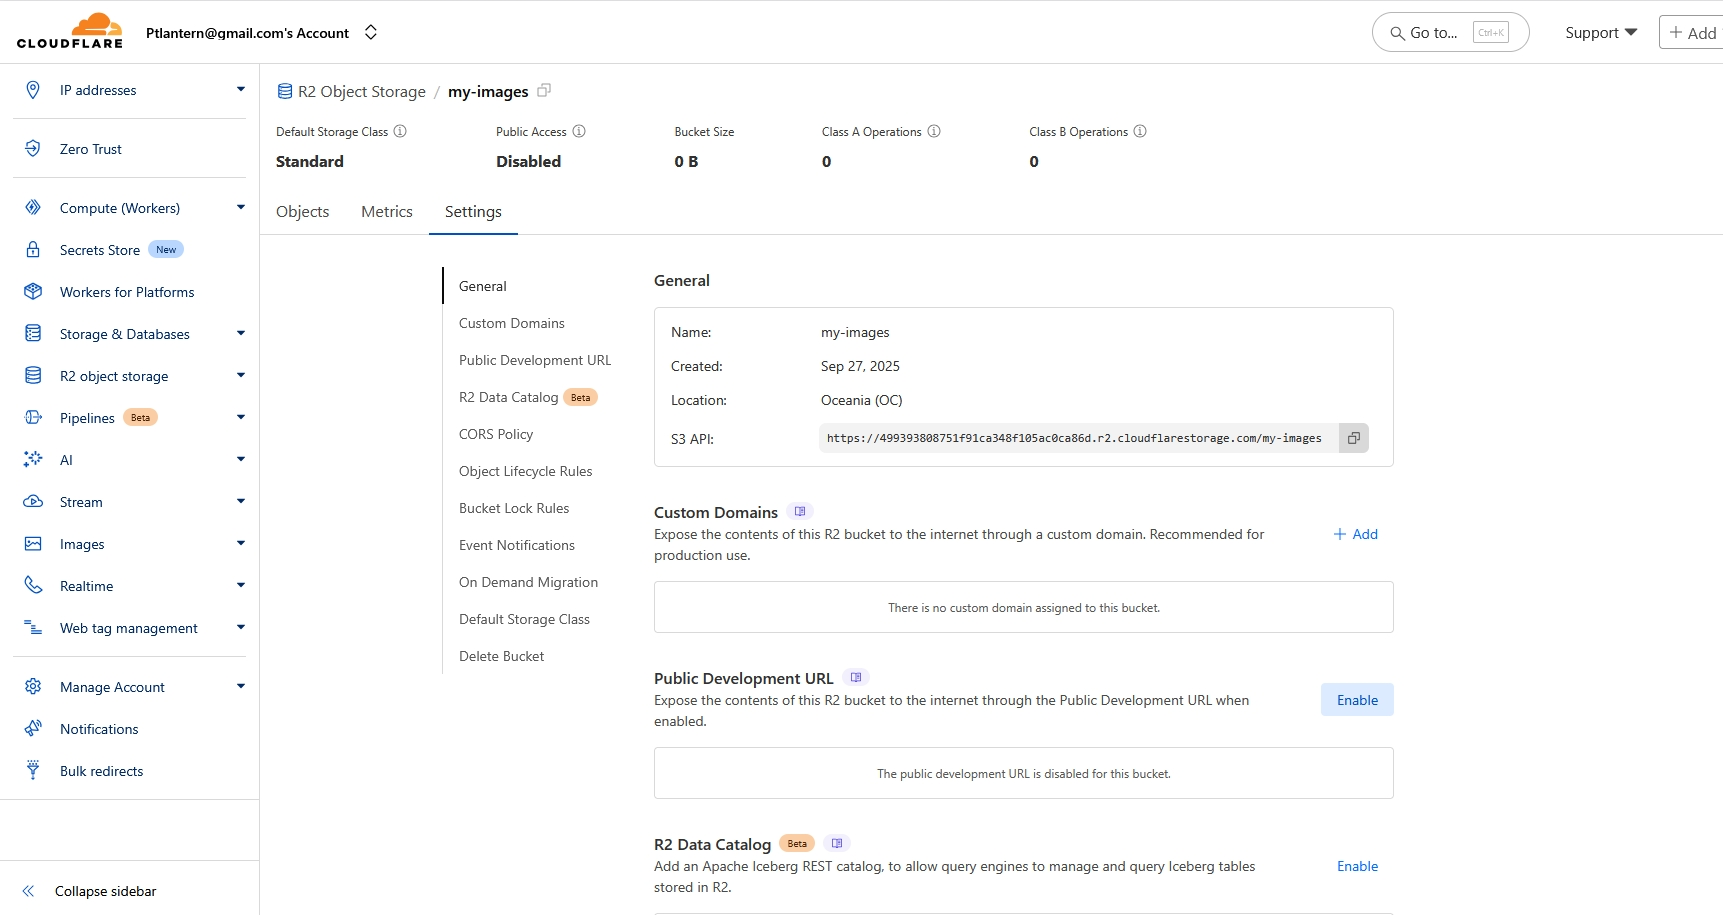
- In the Public Development URL section below, click Enable on the right.
- Type the confirmation text.
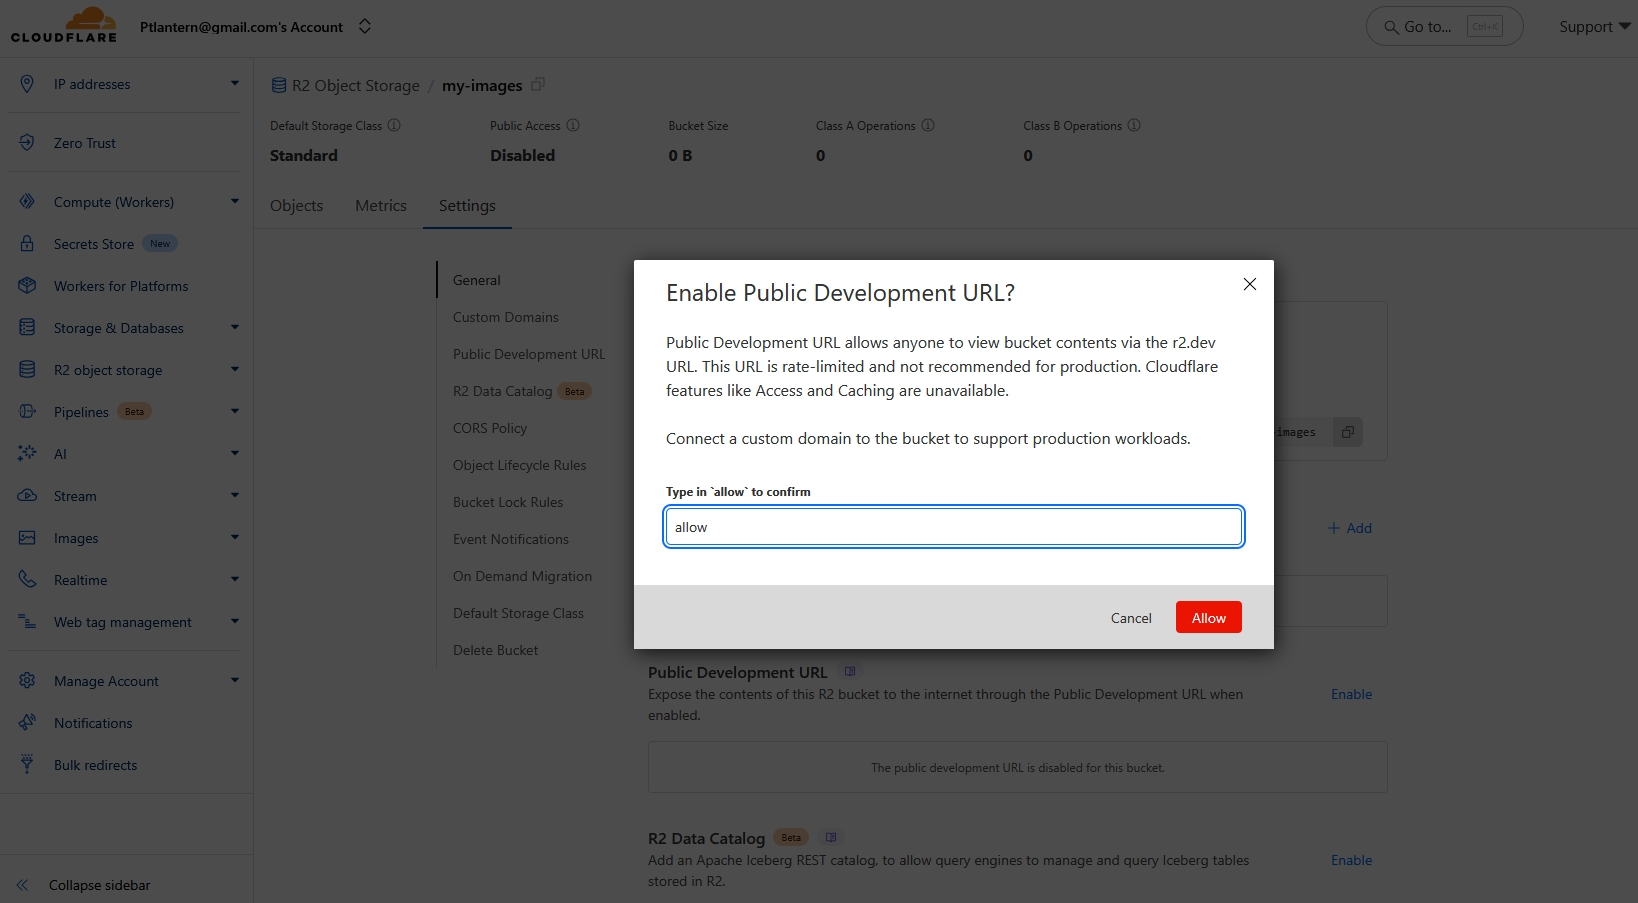
- Note down the
https://pub-....r2.devURL shown here — this is your public-access domain.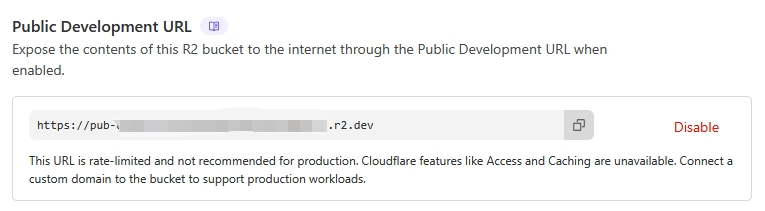
1.3 Create an API token for uploads
The API token is the "key" that lets ShareX upload files to R2.
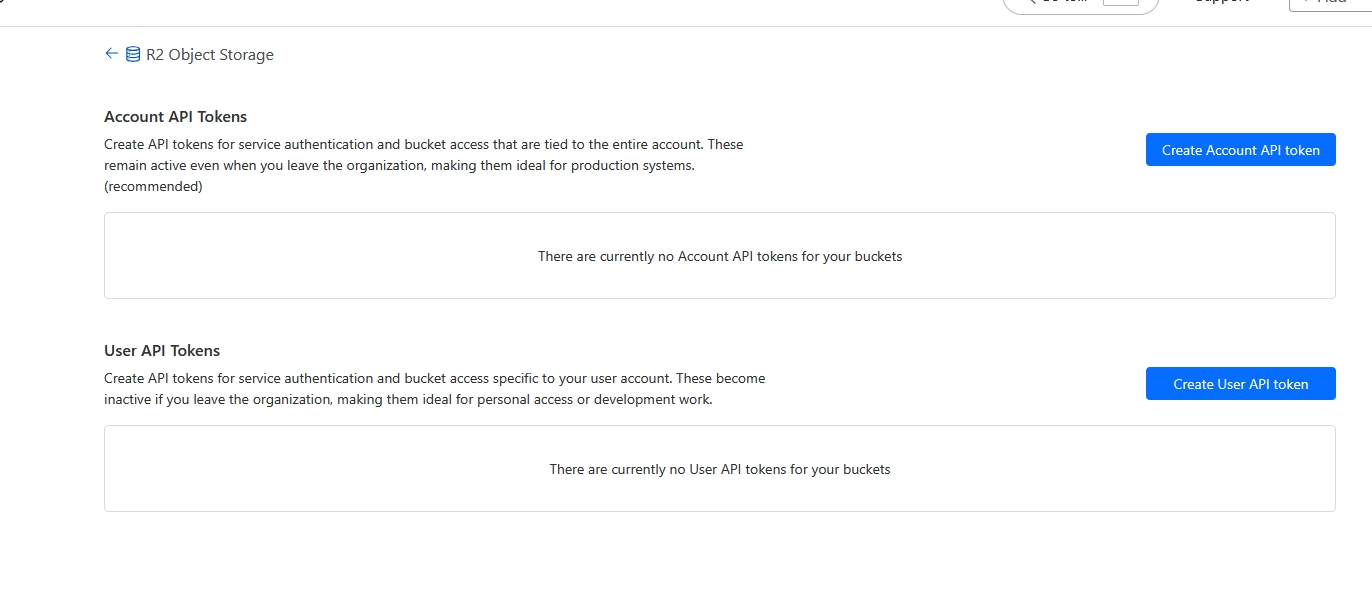
- Return to the R2 overview page and click Manage API Tokens in the top-right corner.
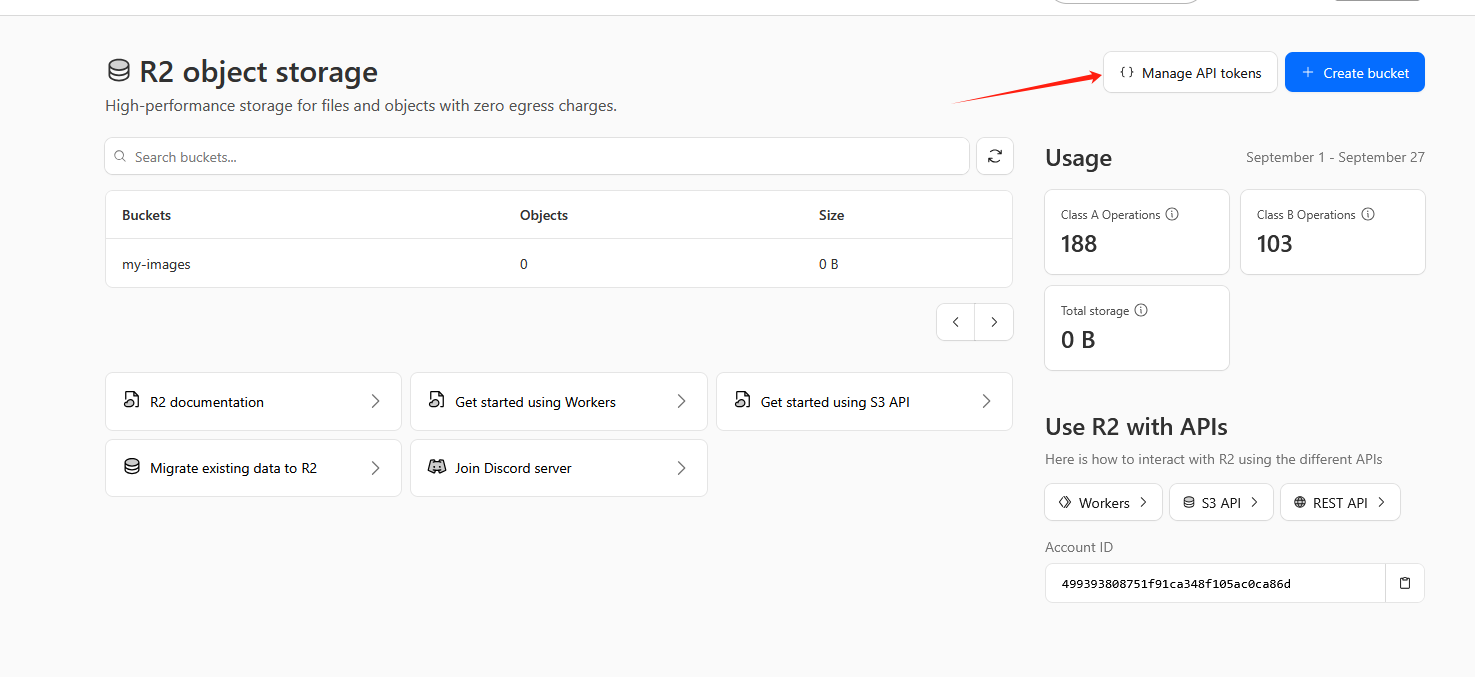
- Click Create Account API token.
- Permissions: you must select
Object Read & Write. This is the critical step — read-only permissions will cause uploads to fail.
- Click Create API token.
- ⚠️ Copy and save immediately! The page displays your
Access Key IDandSecret Access Key. These two secrets are shown only once — copy them immediately and paste them somewhere safe. TheDefault endpointslink at the bottom also needs to be saved.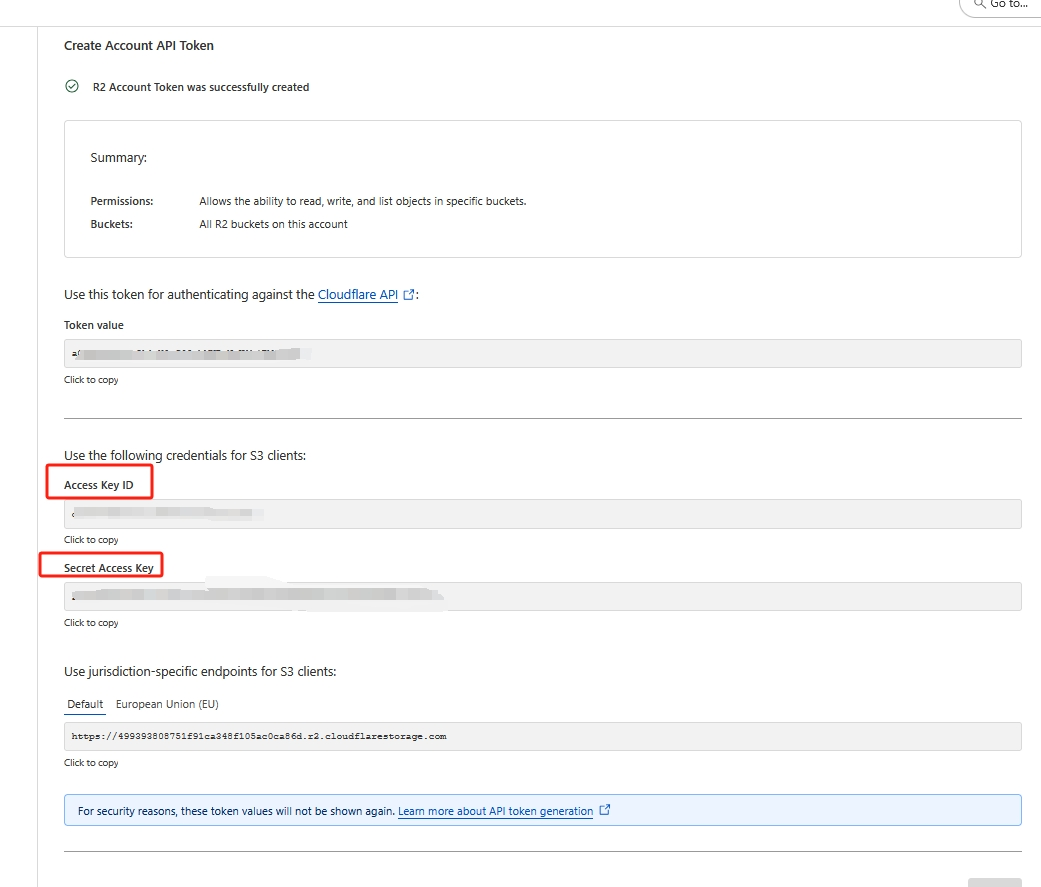
Part 2: Configure ShareX (desktop client)
2.1 Download and install ShareX
Grab the latest version from the official site: https://getsharex.com/
2.2 Configure the S3 upload destination
This is the heart of the setup.
- Open ShareX and, from the main window, click
Destination settings.... - In the popup, select
Amazon S3on the left and fill in your configuration on the right. - Fill in your R2 details exactly as shown in the table below:
| ShareX field | What to enter | Notes |
|---|---|---|
| Access key ID | Paste the Access Key ID you saved | |
| Secret access key | Paste the Secret Access Key you saved | |
| Region | Leave blank | |
| Endpoints | Leave blank | |
| Endpoint | https://<your-AccountID>.r2.cloudflarestorage.com | If you saved this earlier, paste it as-is. Make sure there's no trailing /. |
| Bucket name | Your R2 bucket name (for example, your-org-images-2025) | |
| Upload path | img/%y/%mo/%d/ | Organizes images as img/year/month/day/, which helps with management. ShareX uses % for variables. (Customize as you like.) |
| Use custom domain | Check this box | |
| (Custom domain field) | https://<the r2.dev public URL you noted down> | Note: only paste the Public Development URL you saved earlier — don't append $key$. Modern ShareX handles that automatically. |
2.2.1 Critical Advanced settings
At the bottom of the S3 configuration window, find the Advanced section and apply these settings:
Set public-read ACL on file: must be unchecked. R2 doesn't support this; leaving it checked will produce403 Forbiddenerrors.Use path style request: must be checked. R2 requires this request URL style.
2.3 Set S3 as the default image uploader
- Return to the ShareX main window.
- Click
Destinations->Image uploader->File uploader-> and pickAmazon S3.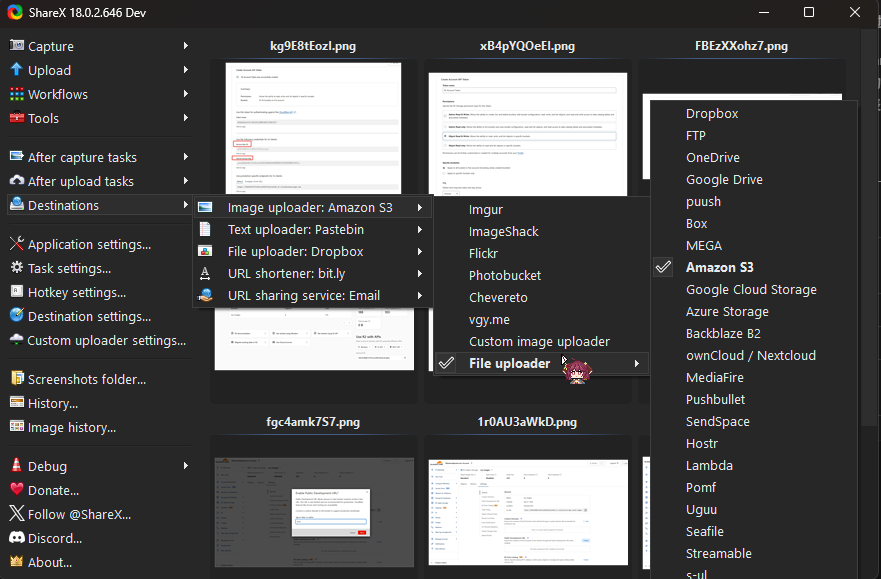
Part 3: Optimize the ShareX workflow
3.1 Auto-copy a Markdown link
- In the ShareX main window, click
Task settings.... - In the popup, select
Advancedfrom the lower part of the left sidebar.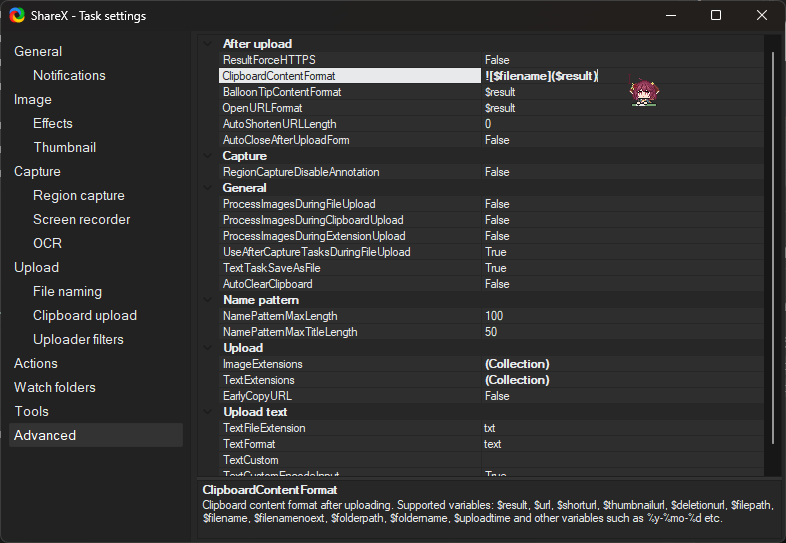
- Click
ClipboardContentFormatunderAfter upload. - Replace the contents with the Markdown format
.
3.2 Enable auto-copy to clipboard
- From the main window, under
After upload tasks, tickCopy URL to clipboardon the right.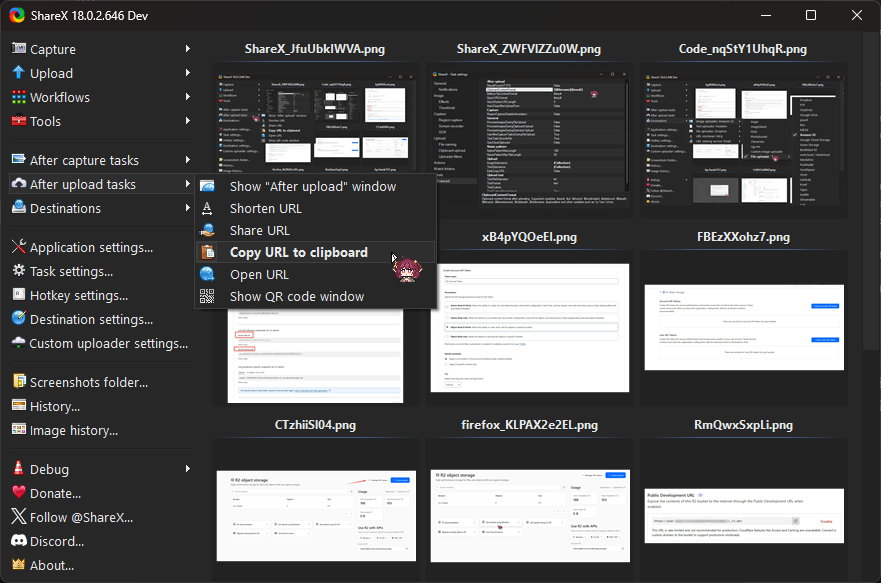
3.3 Change the hotkey
You can change the hotkey under Hotkey settings on the main window, giving you a one-shot flow: screenshot → upload → Markdown on your clipboard.
F.A.Q. and Troubleshooting
Q1: I get a (403) Forbidden error when uploading — what now?
A1: This is the most common issue. Check the following two S3 Advanced settings:
- Make sure
Set public-read ACL on fileis unchecked. - Make sure
Use path style requestis checked. - If it still fails, regenerate an API token with
Object Read & Writepermissions and update it in ShareX.
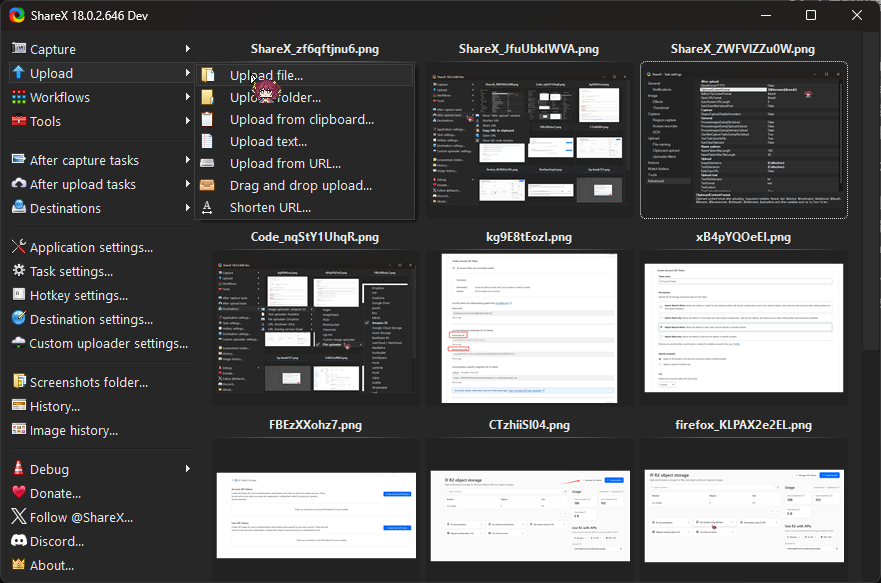
Q2: I don't want to upload screenshots — I want to upload existing local images.
A2:
Use the Upload tab on the left: pick the type of content you want to upload from inside that tab.
Q3: Why can't I use PicGo?
A3: In my testing, PicGo's S3 plugin has compatibility issues with Cloudflare R2 — filenames and paths aren't handled correctly. ShareX's S3 implementation is more standard and currently the more reliable choice.
贡献者
最近更新
Involution Hell© 2026 byCommunityunderCC BY-NC-SA 4.0![]()
![]()
![]()
![]()