How to Deploy Your Own GitHub Image Hosting with PictureCDN
1. What Is an Image Host?
- An image host is essentially a "bed" for storing images — an online service that lets you upload, store, and share images. Once you upload an image, you get a link you can share anywhere without worrying about storage capacity or bandwidth.
What Problems Does an Image Host Solve?
-
- Individual users and small websites often lack the server space and bandwidth to store and serve large numbers of images. An image host provides cheap or even free storage so you can keep as many images as you need without worry.
-
- Image hosts usually include management features, making it easy to organize, search, and reuse your uploaded images.
-
- Performance: Image hosts typically run on powerful servers with CDN (Content Delivery Network) infrastructure, enabling fast image delivery to users worldwide. This is critical for a good user experience.
2. Creating an Image Hosting Repository on GitHub
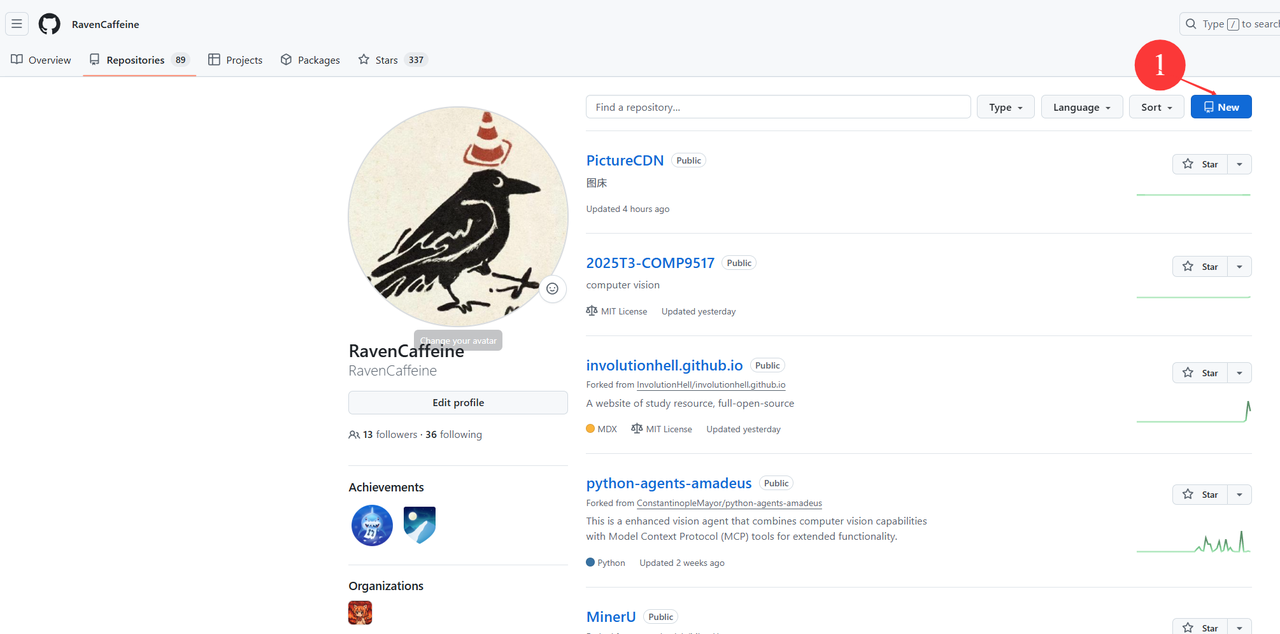
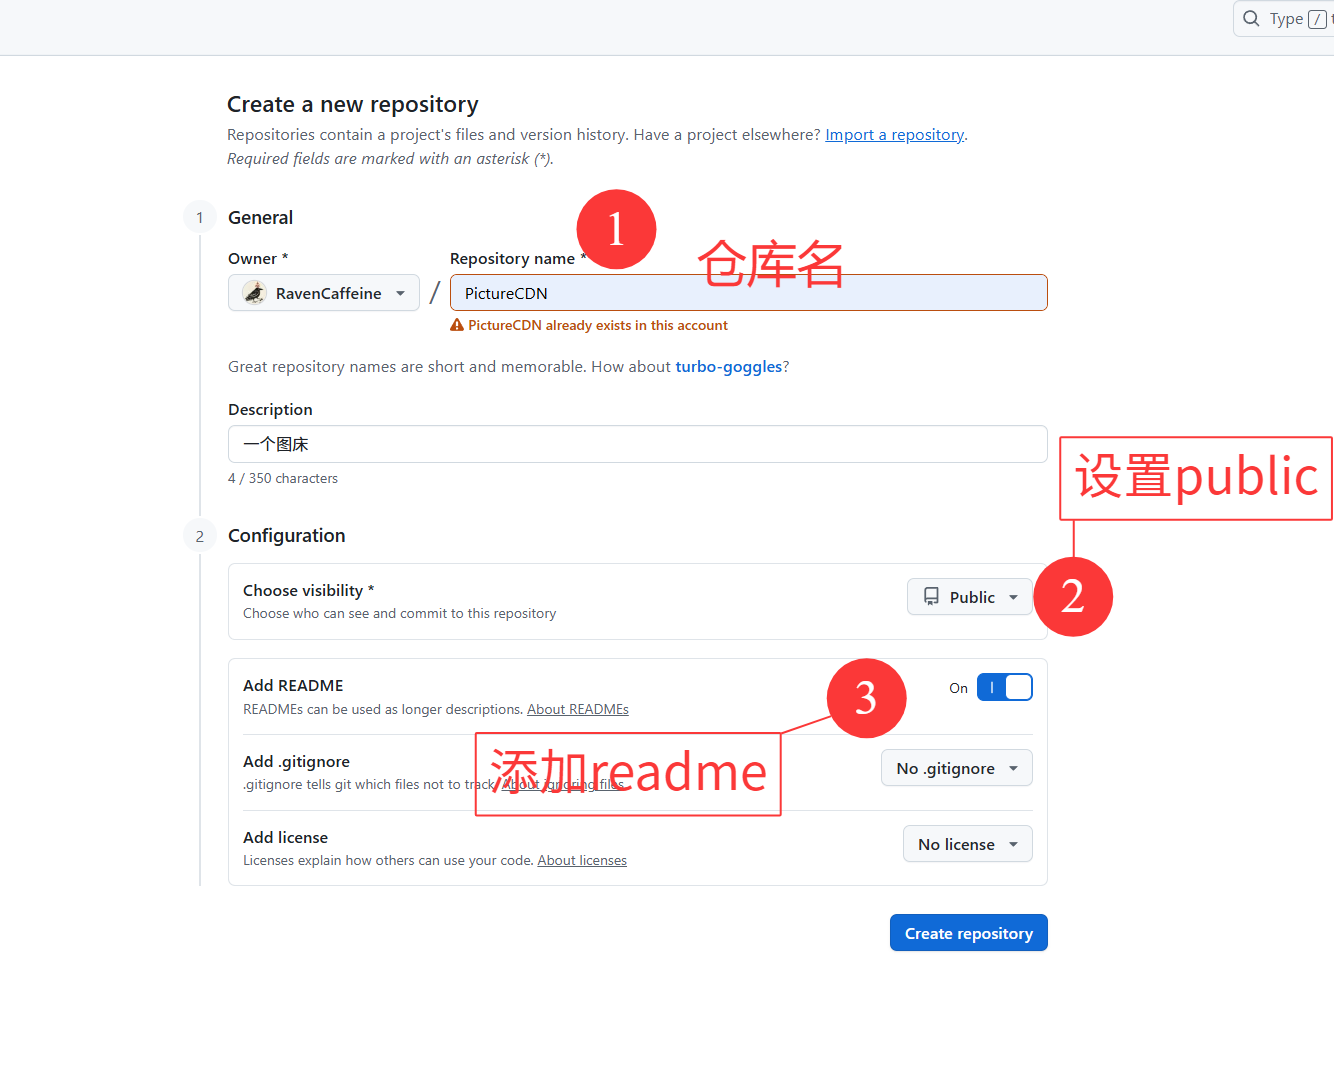
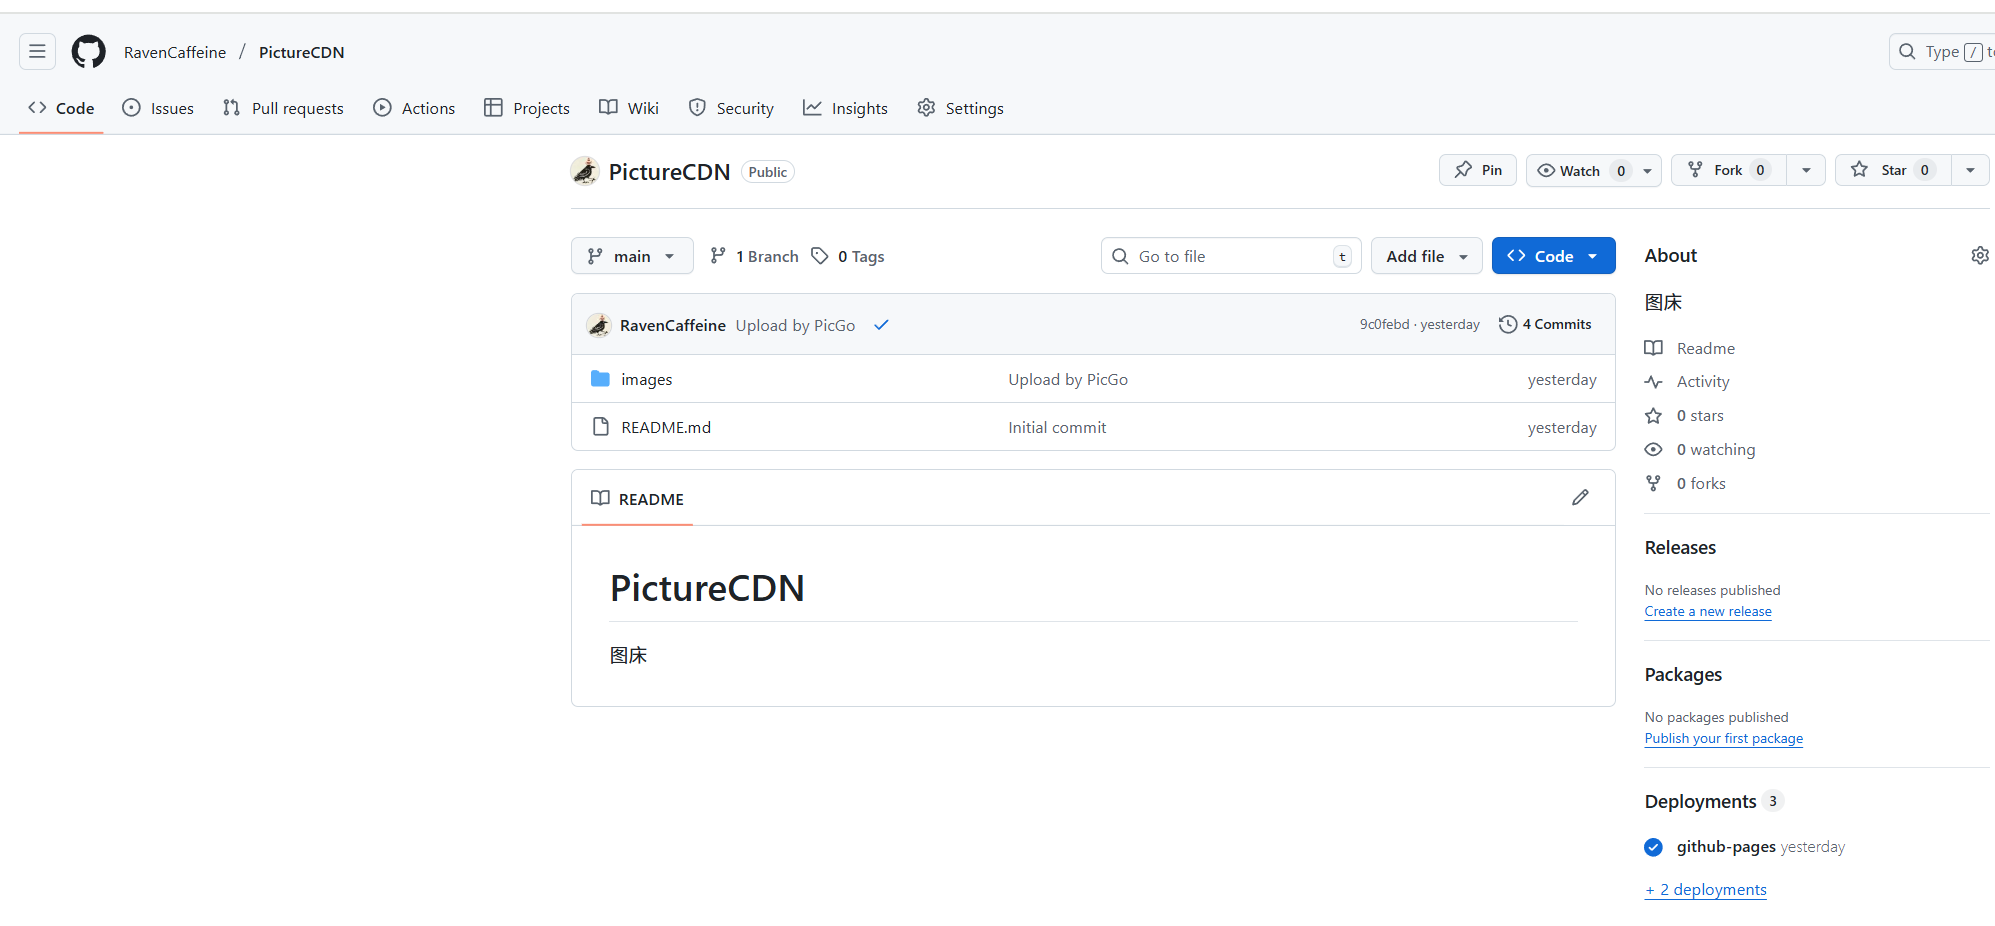
2.1 Create a Repository
2.2 Generate a Personal Access Token
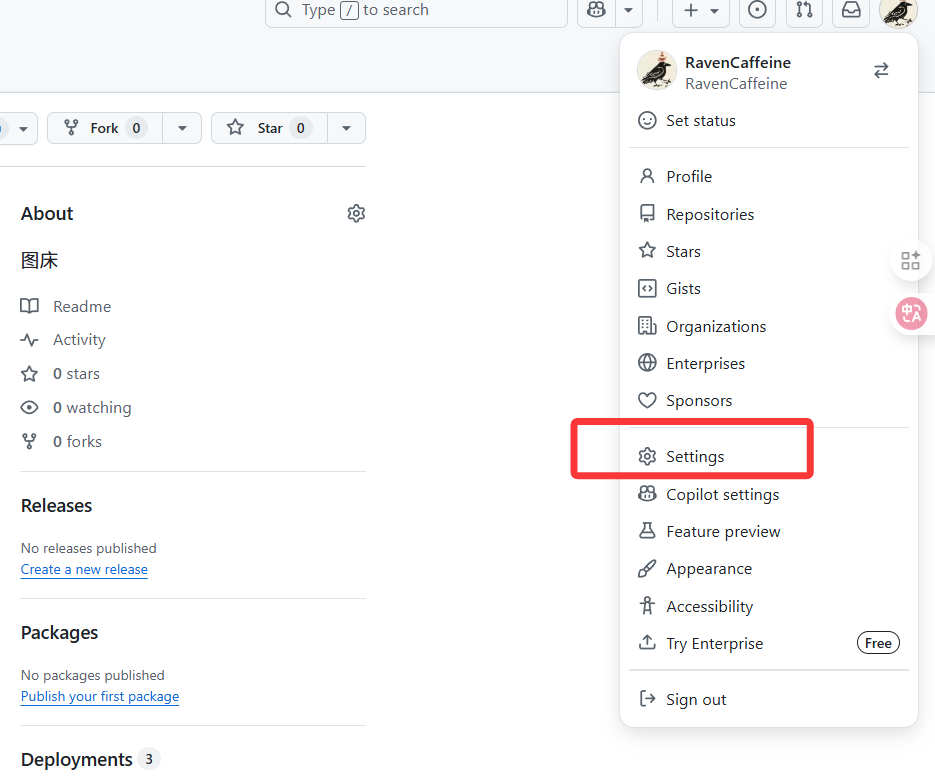
- Click your profile picture or avatar in the top-right corner.
- Select "Settings" from the dropdown menu.
2.2.1 In "Developer settings", click "Personal access tokens".
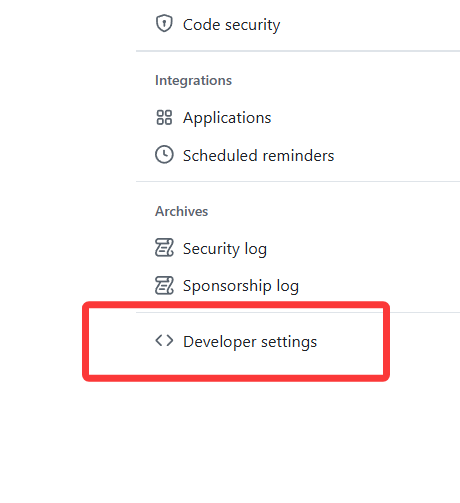
- In the left sidebar, click "Developer settings".
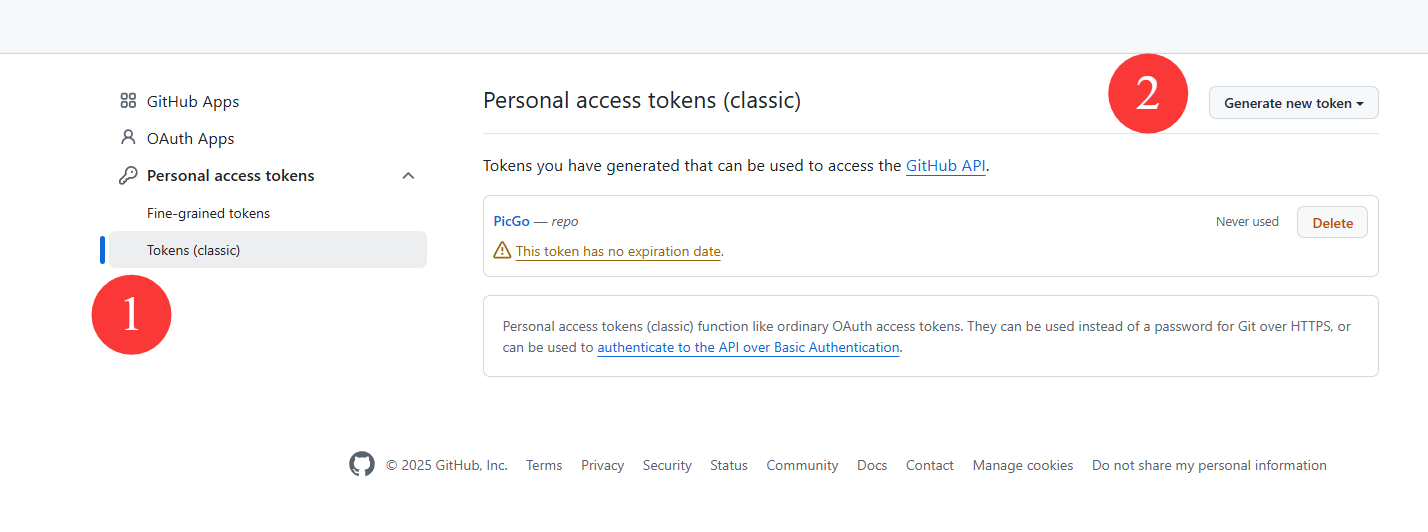
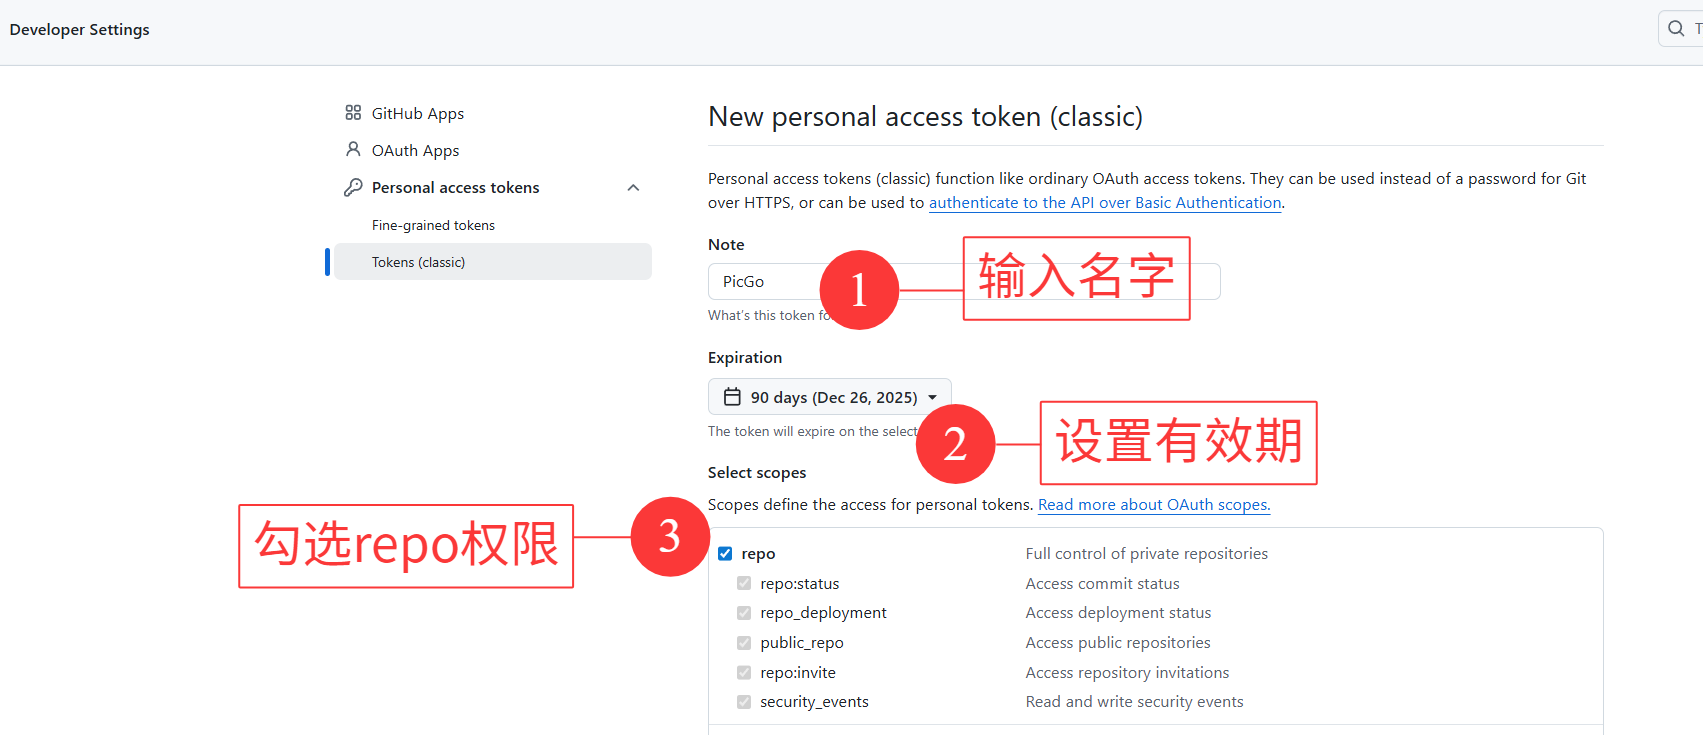
2.2.2 Generate new token (classic)

- In the "Note" field, enter a descriptive name so you remember what this token is for.
- Choose an "Expiration" date. You can set it to never expire or pick a specific date.
- Select the appropriate "Scopes" (permissions). If you only need repository access, choosing "repo" is sufficient.
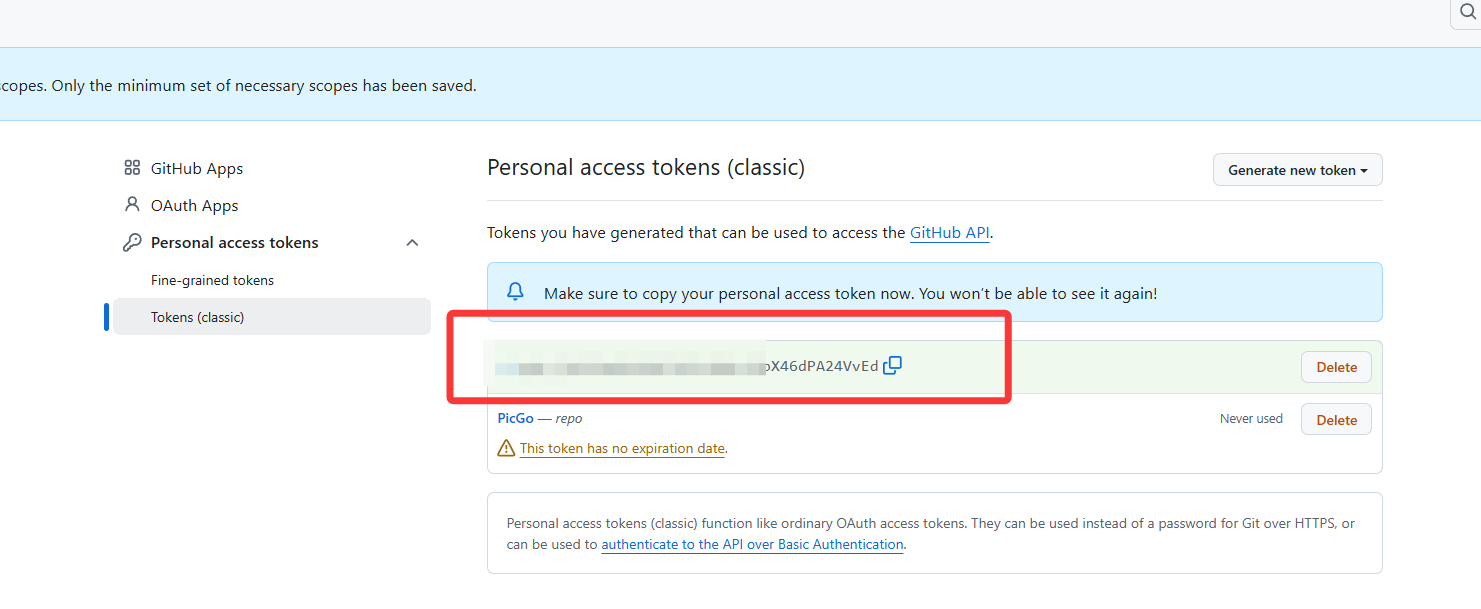
- Scroll down and click "Generate token".
- Once generated, you'll see the token in plain text. Copy and save it immediately — this is the only time you'll see it.
- After leaving the page, you can only see whether the token exists, not its value.
Note:
- Personal access tokens are highly sensitive — treat them like passwords. Never share them or hard-code them in your source code.
- If you suspect a token has been compromised, revoke it immediately in GitHub settings.
- Tokens can perform a wide range of actions on your GitHub account, so choose permissions carefully.
3. PicGo
PicGo is an open-source image upload tool that supports multiple image hosting services, including Qiniu Cloud, Upyun, SM.MS, and GitHub. It helps you upload local images to your chosen host and generates shareable links automatically.
3.1 What Problems Does PicGo Solve?
- Image upload: PicGo uploads local images to your image host quickly, saving manual upload time.
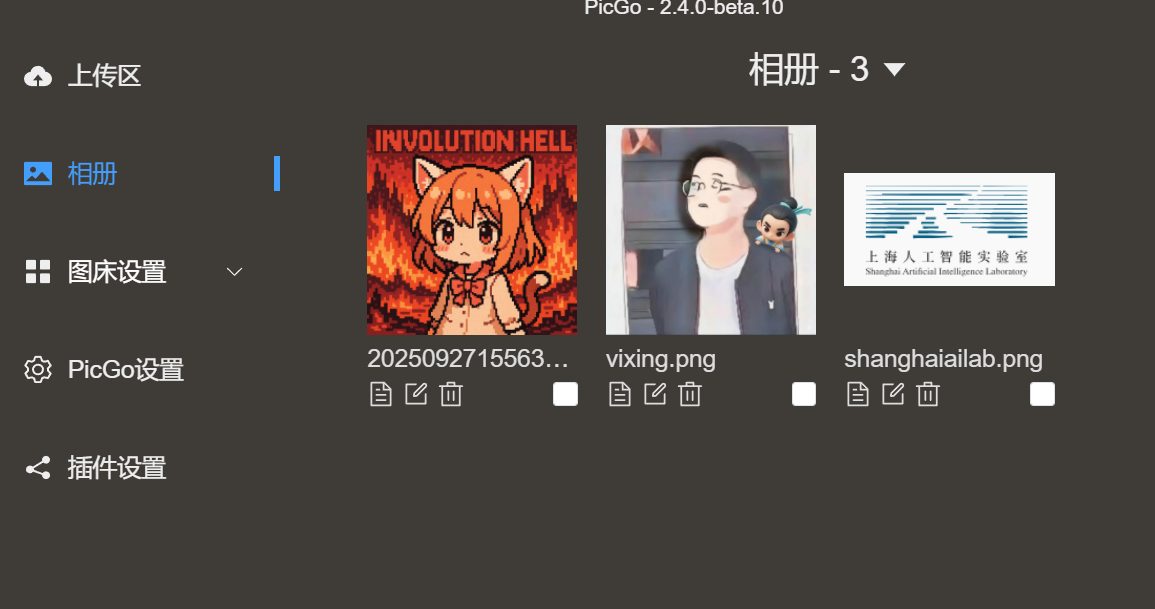
- Image management: PicGo supports batch uploads and makes it easy to find and reuse previously uploaded images.
- Link generation: After uploading, PicGo automatically generates a shareable link you can use anywhere.
- Multi-host support: PicGo works with multiple image hosting services and lets you switch between them at any time.
3.2 Download
- Shandong University mirror:
- https://mirrors.sdu.edu.cn/github-release/Molunerfinn_PicGo/v2.3.1/
- Original GitHub repository (releases tab):
- https://github.com/Molunerfinn/PicGo
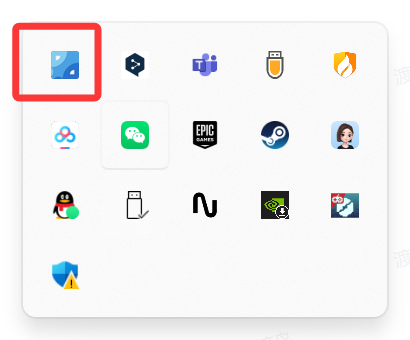
- After installing, open it from the system tray icon in the bottom-left corner.
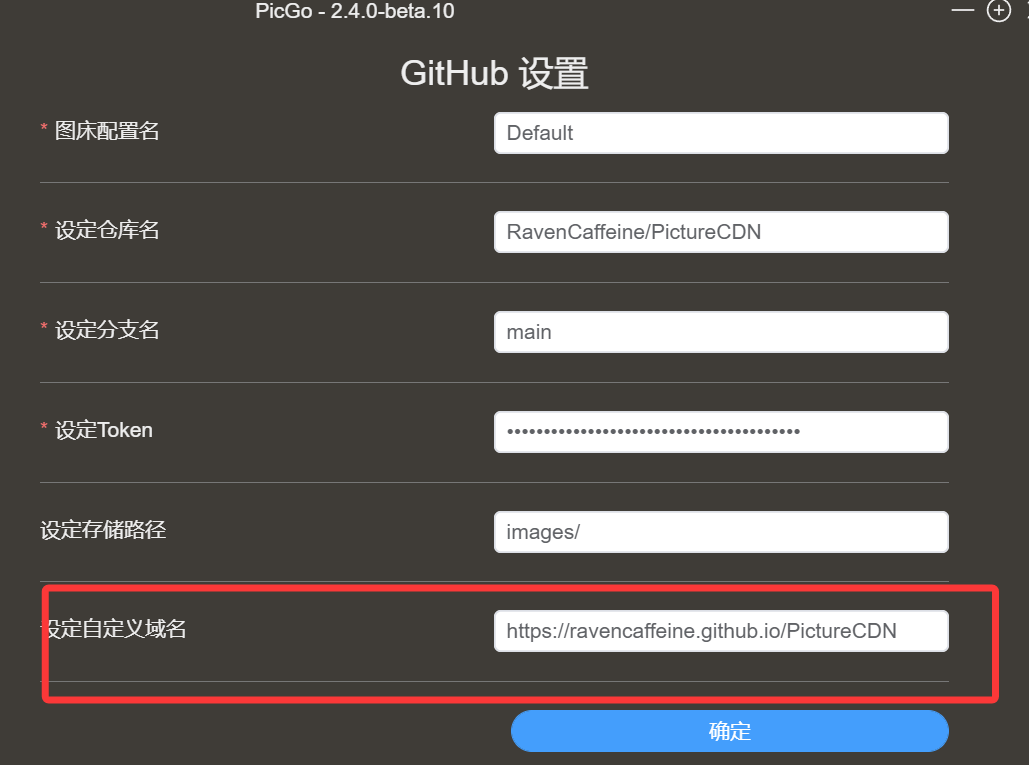
3.3 Configuring the GitHub Image Host
-
Open Image Host Settings
-
Select GitHub
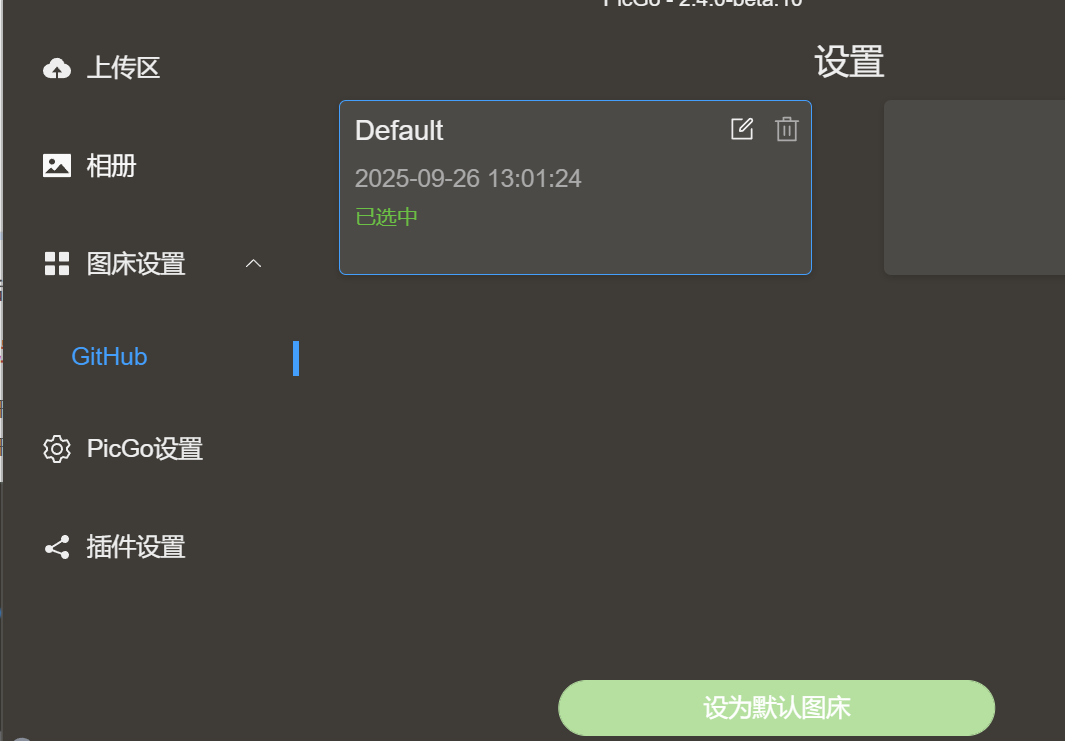
-
Repository name: Enter
<your-username>/<repo-name>— the repo you created in step 2.1. -
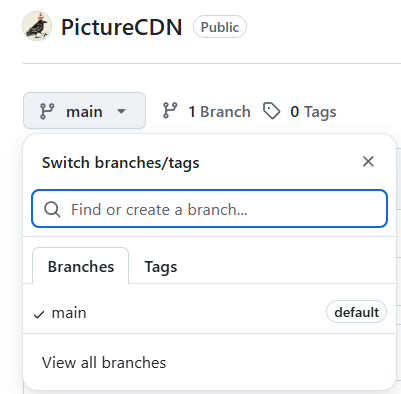
Branch: The branch where your images will be stored. Usually
mainormaster. -
Token: Paste the token you copied in step 2.2.
-
Storage path: A folder within your repo. Setting it to
img/is a common convention — it will be created automatically. -
Custom domain: Set this if you want to use GitHub Pages (see section 4).
4. Setting Up a Custom Domain with GitHub Pages
4.1 GitHub Pages Basics
GitHub Pages is a static website hosting service. There are three types:
1. User / Organization Site:
- Each GitHub account can have exactly one user or organization site.
- The repository must be named
<username>.github.io(or<org>.github.iofor organizations). - The URL will be
https://<username>.github.ioorhttps://<org>.github.io. - Limit: one user/org site per account.
2. Project Site:
- A project site is tied to a specific repository, with URL
https://<username>.github.io/<repo>. - Any repository can have its own project site.
- Limit: no explicit cap — one project site per repository.
3. General GitHub Pages Limits:
- Recommended source repository size: under 1 GB.
- Published site size: no more than 1 GB.
- Monthly bandwidth: 100 GB (soft limit).
- Hourly build limit: 10 builds (soft limit, applies to GitHub Actions builds).
4.2 Enabling GitHub Pages
To get a cleaner image URL, enable GitHub Pages for your repository:
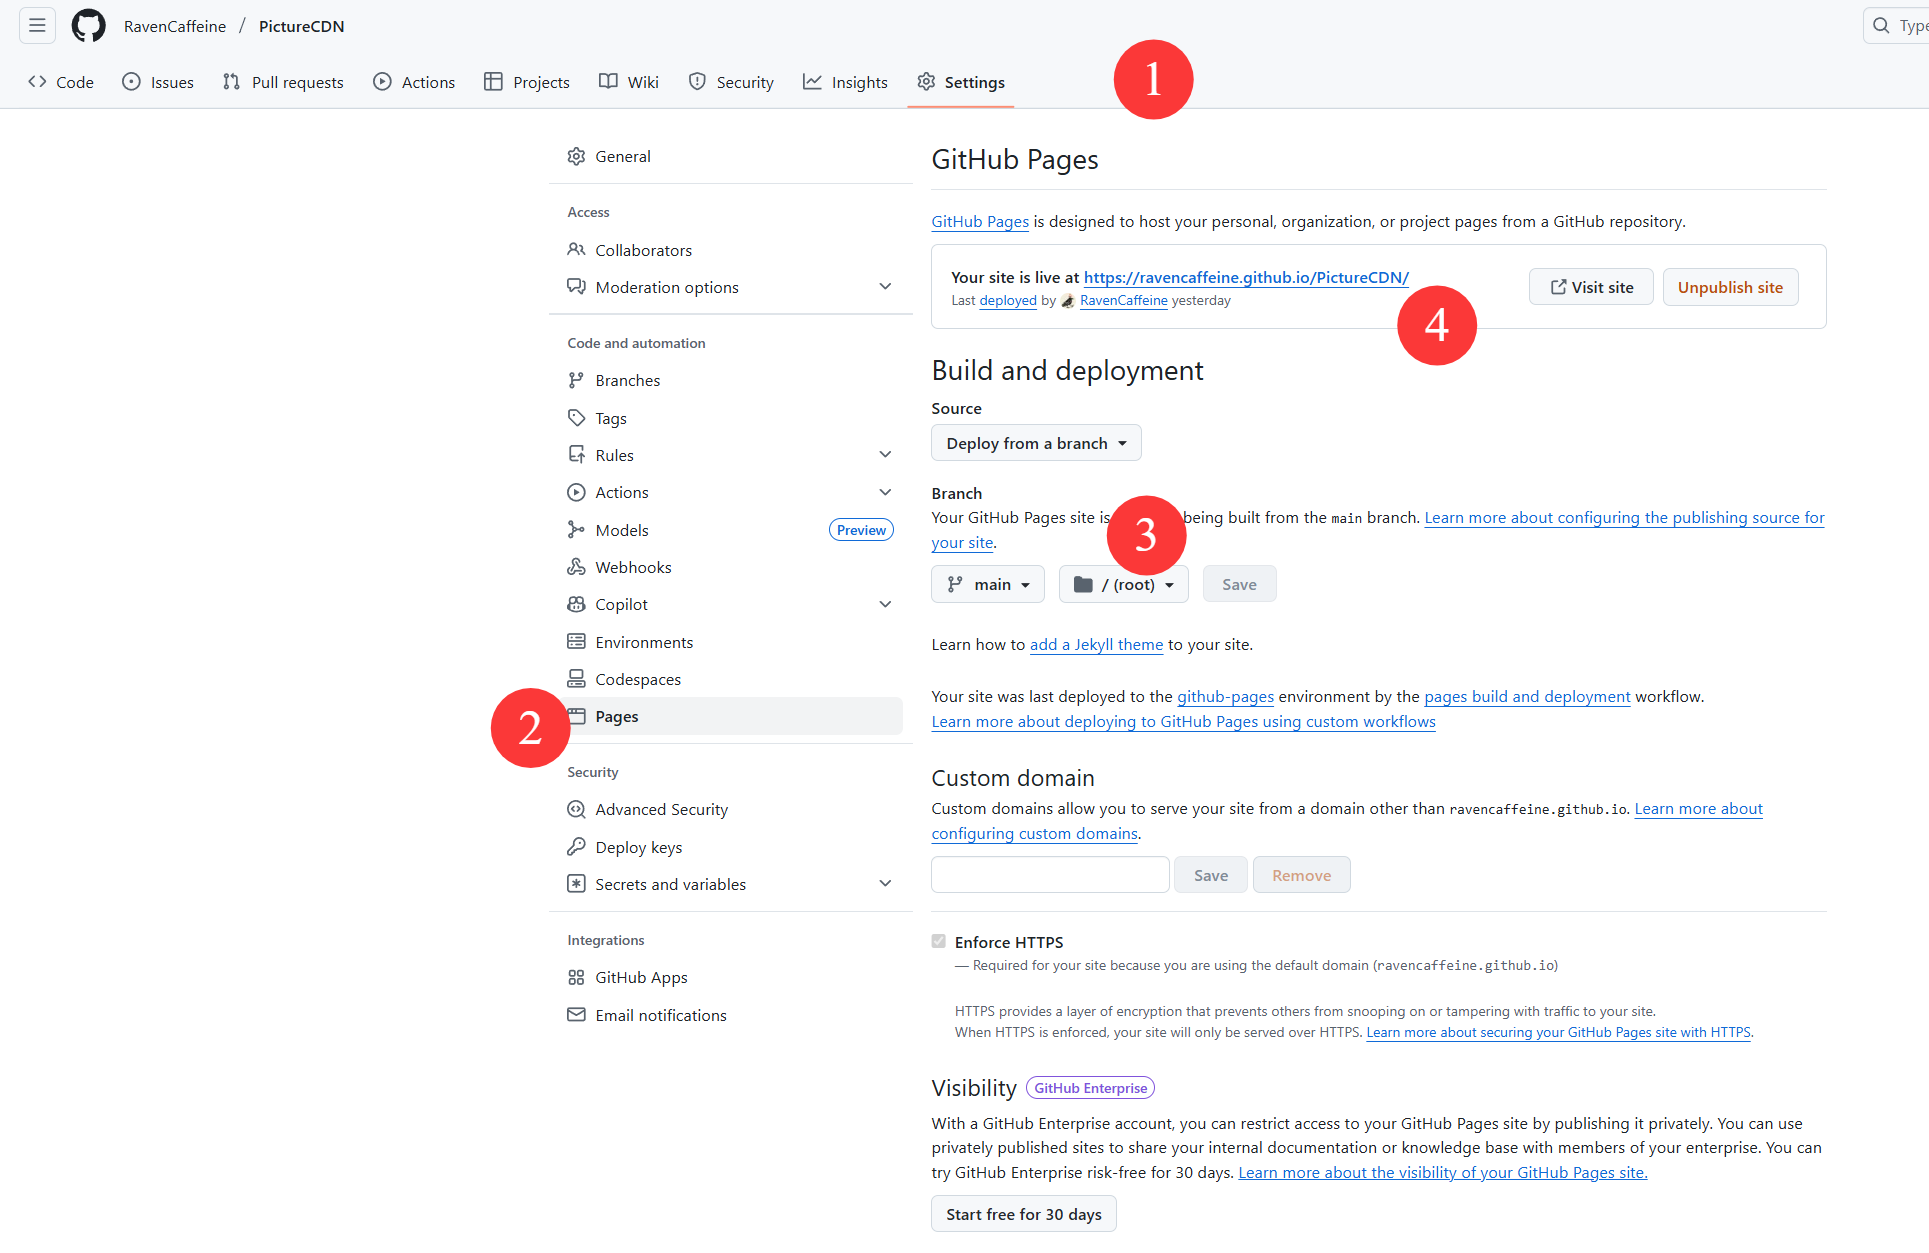
- Go to your repository on GitHub and click "Settings".
- Scroll down to the "Pages" section.
- Under "Source", select your
mainbranch (ormaster, depending on your default) and click "Save". - After a moment, GitHub will generate a Pages URL (e.g.,
https://your-username.github.io/image-hosting). - Back in PicGo's GitHub image host settings, set "Custom Domain" to this Pages URL.
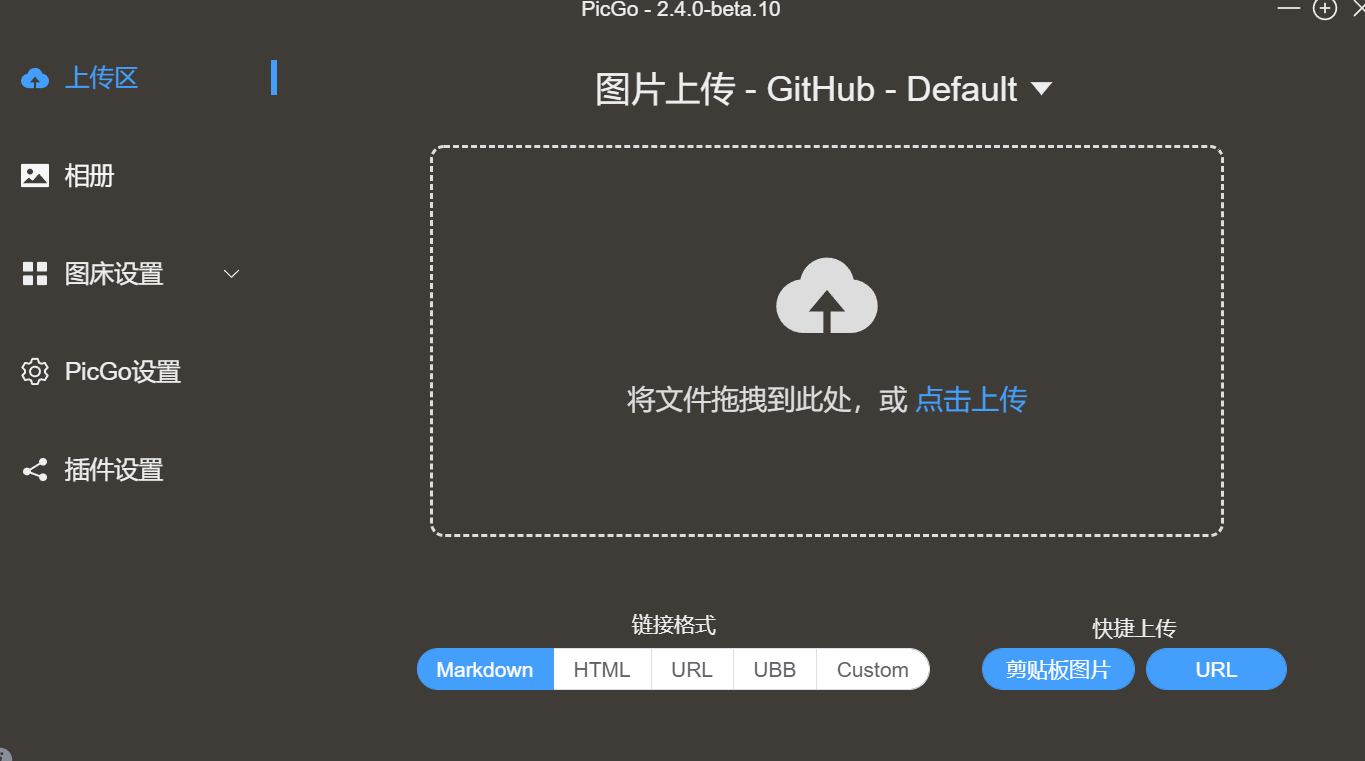
5. Uploading Images
- Drag and drop: Open PicGo and drag an image directly into the window — it uploads automatically.
- Manual file selection: Click the "Upload" button in PicGo and select a local image file.
-
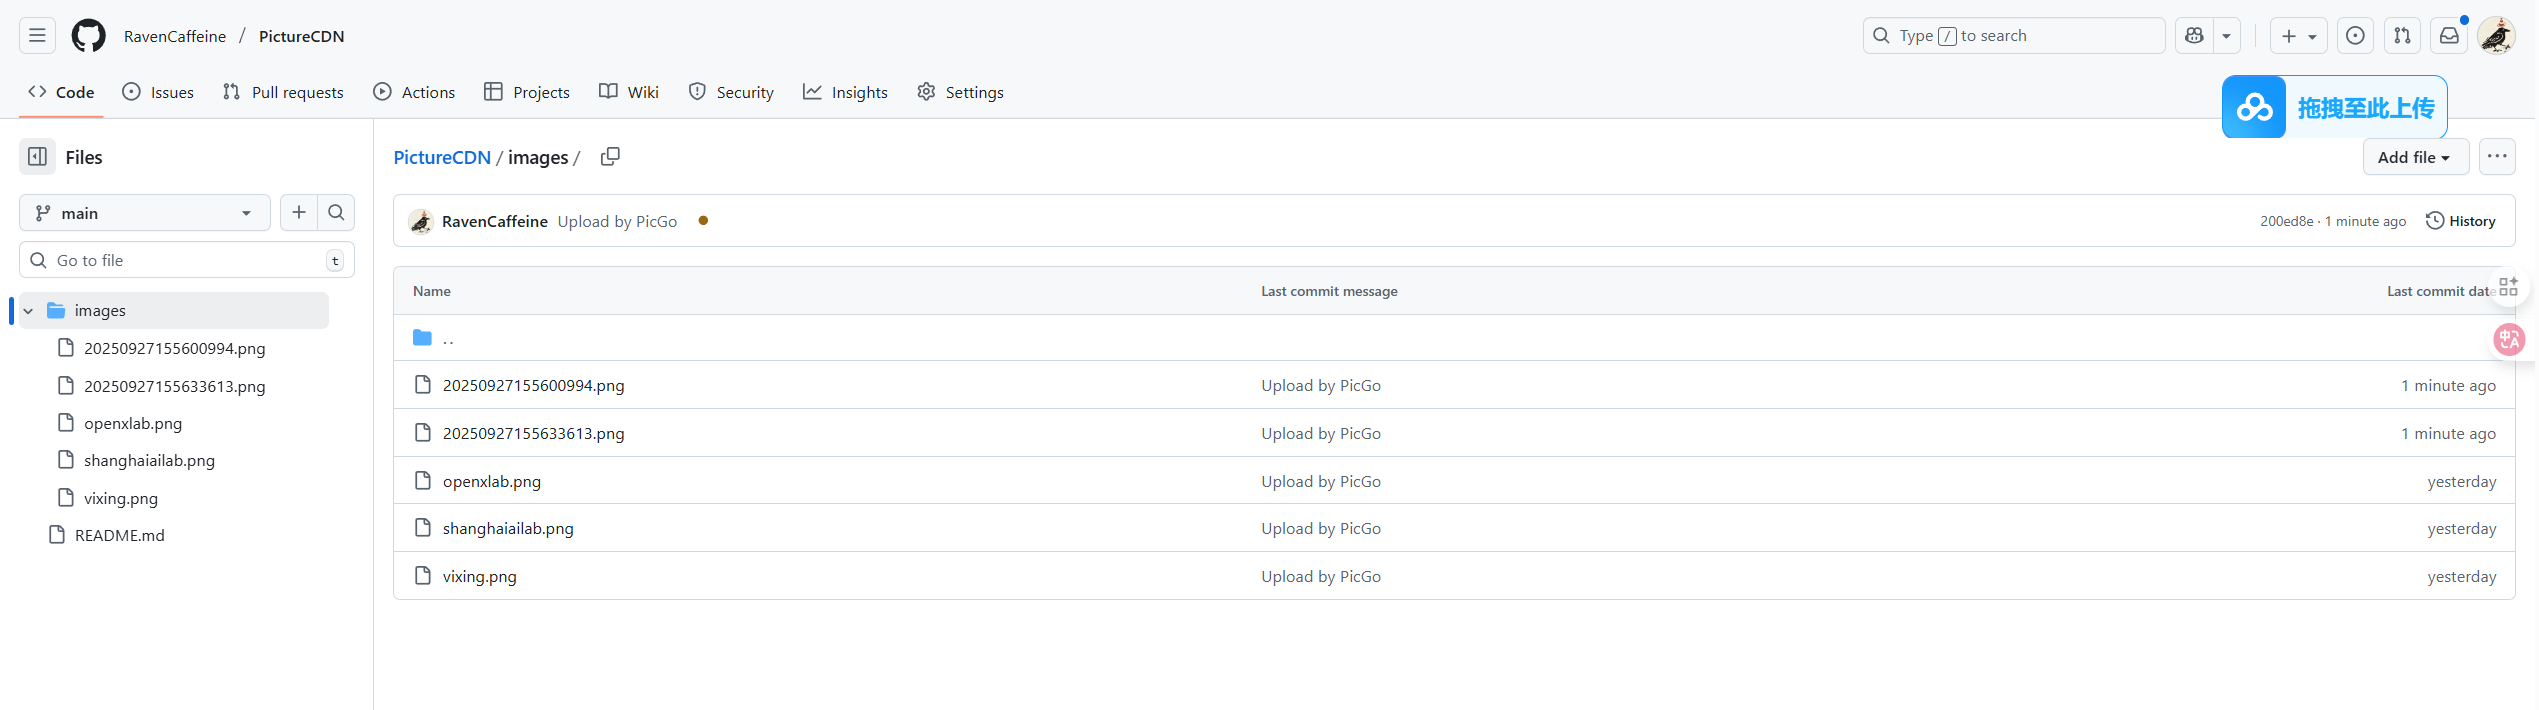
The image will be automatically committed to your repository.
-
You can now grab the image link.
References
-
- Complete tutorial: "Set Up a Personal Image Host on GitHub in 2025 — Step-by-Step with Screenshots" https://www.cnblogs.com/ljbguanli/p/18928090
-
- CSDN post by "三金C_C": PicGo Configuration — Free Image Hosting
- Original link: https://blog.csdn.net/QAZJOU/article/details/146449613
贡献者
最近更新
Involution Hell© 2026 byCommunityunderCC BY-NC-SA 4.0![]()
![]()
![]()
![]()